Fall Appliqué Pillows

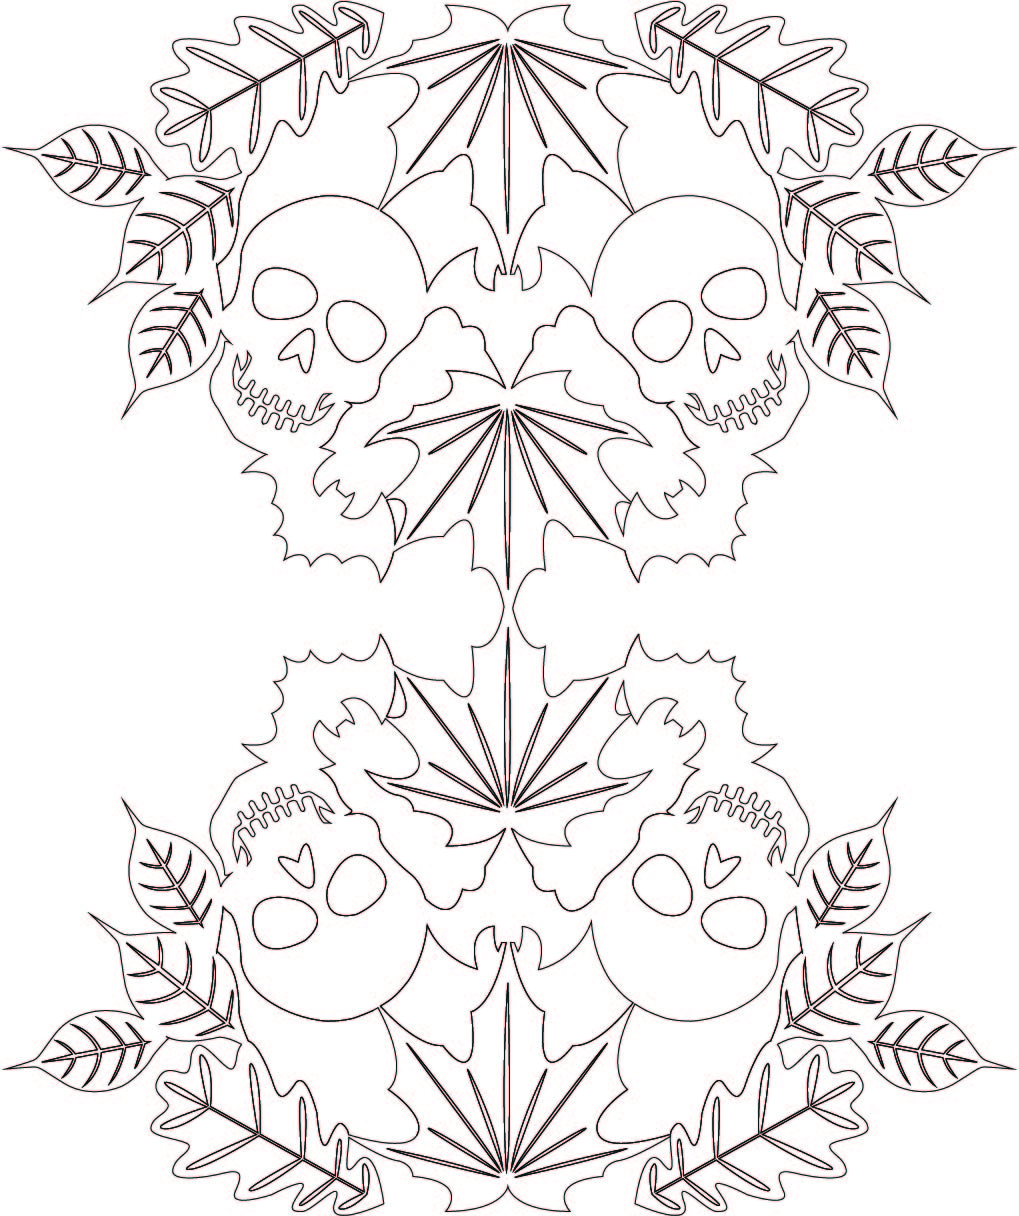
Hey ghouls and creeps! This week I repurposed the Fall Jacket project appliqué to make some embellished throw pillows perfect for Fall(or all year long if you’re that kind of person). I love this appliqué web of leaves, skulls, and bats! So much so that I wanted to use this file again for a home decor project. This motivation paired with the desire to cover the other throw pillows on the couch to coordinate with the Tombstone Throw Pillows all came together for this project! These throw pillows feature a two-inch extension of contrasting material all the way around the pillow perimeter as well as the above-mentioned appliqué. The finished pillow fits an 18″X18″ pillow form.

The Fall Appliqué Pillows are rated as being medium difficulty. This project is great for practicing appliqué stitch finishes. The appliqué shapes provide a variety of shapes, corners, and curves to straight stitch, blanket stitch, or satin stitch around. You may also choose to do straight stitch lines through the appliqué to stabilize.
Important note: The quantities below are for two throw pillows!

Step 1: Cutting your Pillows: Pro-tip: Prior to cutting out your pillow appliqués iron your Heat n’ Bond to the wrong side of your appliqué material. This will make it so you’re only cutting the materials needed for the appliqué once, and you won’t have to match up edges later!
Use the JPG or SVG files below to cut your appliqué on your Cricut machine or laser cutter.
SVG file: https://bjdiycutfiles.s3.us-west-2.amazonaws.com/autumn+pillow.svg

From your orange stripe material cut two panels per pillow measuring 7″X19″. Cut your black material to make one panel per pillow measuring 6″X19″. Cut enough 3″ wide strips from the turquoise to have 4 strips measuring 24″ in length per pillow. After cutting the extension strips, cut two back panels per pillow measuring 11 3/4″X23″.
Step 2: Piecing your Pillow Fronts: Sew your two orange striped fabric panels on either side of the black panel with a 1/2″ seam allowance. Repeat this step if you have more than one pillow.

Step 3: Appliqué Pillow Front: Gently peel the paper backing off of your appliqué.

Pro-tip: Before trying to center your appliqué on your pillow front, fold your pillow front into quarters and press. This will leave reference lines for appliqué positioning ease! Center your appliqué using your press lines and iron to fuse in place.
Lift and rest the iron carefully so that the appliqué doesn’t migrate while pressing. Once all areas of the appliqué have been fused thoroughly, you can begin stitching to stabilize!

I chose to do some straight stitch lines through both sides of the appliqué rather than stitch around all the edges. Something to keep in mind if you chose to go the straight stitch line route, the appliqué may lift away from the pillow front where it’s not sewn. This was a risk I was willing to take for the sake of time and curiosity. I’m curious to see how well the Heat n’ Bond holds with less stitching. Let me know below in the comments if you are interested in an update!

The stitching pattern that I executed to stabilize the appliqué was one stitch line down the center, and one stitch line 3/8″ from my panel seams on both sides. I later added a shorter stitch line 2″ from the outside stitch line near the panel seam. This stitch line ended at the leaf tip, approximately 3″ from the front edge. For extra reinforcement sew down the center of the leaves closest to the outside.

Step 4: Throw Pillow Assembly: Important note: the seam allowance used for this project is 1/2″ unless otherwise noted. Attach your pillow extensions beginning with the sides. Fold the seam allowance of the sidebands toward the center of the pillow.


Starting and ending at the sideband seams sew the other bands to the top and bottom of the pillow front.

Create mitered corners by pressing the top and bottom bands so that the seam allowance is turned under. Then fold the band into a forty-five-degree angle to be parallel with the sideband. Repeat these steps for all four corners. Edgestitch along each mitered corner fold. I also sewed 1/4″ from the pillow edge to keep the excess band material in place.


Place your pillow back panels together with right sides touching. Sew 4 1/2″ in from the top and bottom of one of the 23″ sides. Make sure to stitch back and forth a few times at the end of both stitch lines to reinforce! Mark with chalk or water-soluble ink your seam allowance on both sides of the opening between your stitch lines.

Lay the right side of the back against the right side of the front and sew all the way around the pillow’s perimeter.

Flip the pillow right side out and press the extension seam open the best you can! Press the pillow extension from the outside and pin along the extension base. Stitch in the ditch along the bottom of the pillow extension. Insert your pillow form inside the covering and slipstitch the center back closed.


Congrats you have new festive and fun throw pillows to compliment your living space! Let me know below in the comments if you’ve tried this project or the Fall Jacket project! Happy sewing ghouls!
Liking the content you see here on Britni Jade DIY? Make sure to subscribe to the email list and follow Britni Jade DIY on Instagram, Facebook, and Pinterest! Links are provided below!
Ready for your next project? Here are some tutorials on the blog I think you’ll like! Frame Flip tutorial: https://britnijade.com/frame-flip/, Macrame Wall Hanging: https://britnijade.com/macrame-wall-hanging-w-bones/, or the Spider Web Macrame: https://britnijade.com/spider-web-macrame/. Enjoy!


Love the colors! What a great design for a pillow! Can’t wait to make this!
Thank you so much!